Mushrooms Tree Stump Fairy House Money Box DIY Idea: Beautiful, Easy & Cheap
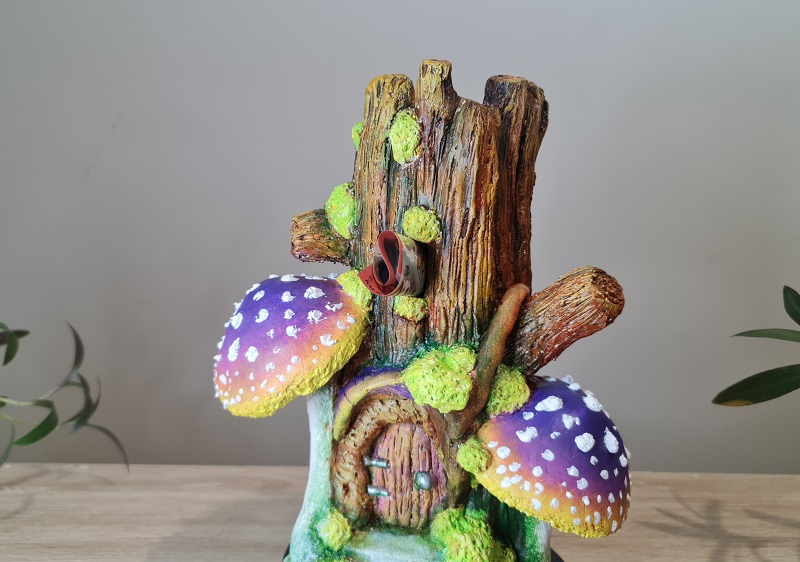
Let me share mushrooms tree stump fairy house, my latest mushroom house project that can be used as money box/ coin bank too.
Are you ready to make this craft? Let's do it.
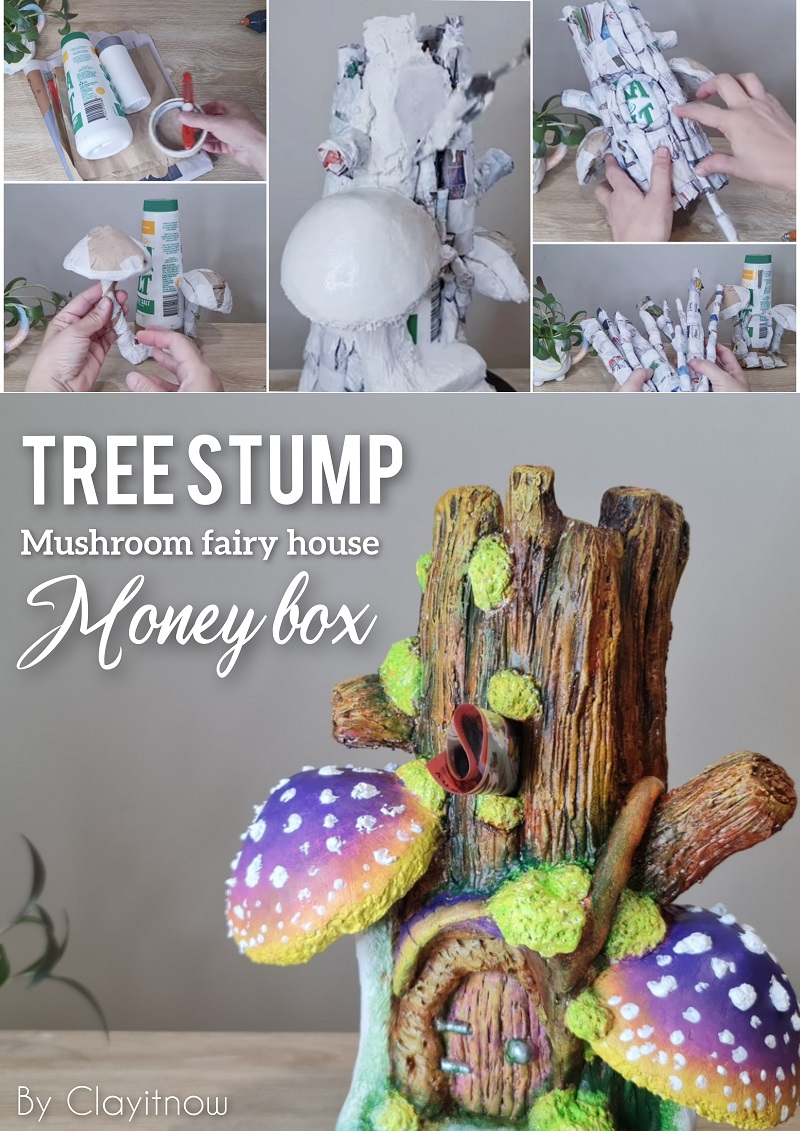
Steps to make mushrooms tree stump:
In this mushrooms tree stump project, I use 2 plastic bottles. I chose used plastic bottle from table salt for tree trunk body and smaller vitamin plastic bottle with screw cap.
I need that screw cap to open and close the bottle at the bottom so I can take out the coin/ money out.
By the way, whatever size of plastic bottle with screw cap you use, make sure that it is big enough for the largest coin you have in your country and smaller than the bottom part of the table salt plastic bottle.
Other materials and tools we need:
- Old newspaper or used brown paper bag from fast-food chain.
- Masking tapes/ painter tapes
- Hot glue and hot glue gun
- Craft knife/ scissor
- Acrylic paints. I use white for undercoat, burnt umber, burnt sienna and yellow ochre for the tree trunk, lemon yellow, pink, and purple for the mushrooms, lime green and sap green for grasses and subtle representation of moss.
- Air dry clay/ clay paste. I use basic clay texture paste ingredients: plaster of Paris 3 parts, 1 part of flour, and water. I varied the amount of water so I can spread it easily or form some shape like the way I do with store bought air dry clay.
First step: I cut the screw cap plastic bottle, then cut the bottom part of table salt bottle exactly the size of the screw cap bottle. Insert the part of screw cap plastic bottle to the hole and secure it with hot glue.
Second step: make cardboard strip and attach it to the perimeter of table salt plastic bottle at the bottom part with enough height to cover the bottle cap.
Third step: make the steps in front of the entrance with crumpled brown paper, and use painter tape to keep the shape in place. Also, make the 2 mushrooms with the same type of paper and tapes.
Attach those parts to the body of tree trunk/ table salt plastic bottle with hot glue.
Also, add crumpled paper around the entrance.
You can see our mushrooms tree trunk house shape at this stage. We need 1 more step to finish the structure/ house frame.
Fourth step: Finally make some paper tubes with old newspaper, and make them slightly flat. You can vary the length, the thickness and width. Stick these paper tube around table salt bottle. It will form natural tree stump shape.
Fifth step: this would be final step to complete our mushrooms tree stump fairy house project. I start the painting with tree stump. No black undercoat this time. I use burnt umber, varying the consistency by adding water and add more dimension by dabbing some burnt sienna, yellow ochre and sap green.
I paint the mushroom straight onto the white surface with diluted paints and build up the color layer by layer. I start with yellow at the bottom part of the mushroom, adding pink at the middle part and purple on top. I blend those 3 colors with brush. You can see my painting process at my YouTube channel. By the way, don't forget to subscribe to Clayitnow channel for more ideas and tutorial because I don't publish all tutorial on my website.
Alright, back to our mushrooms tree stump project, final painting would be the white dots on the mushroom. I mix baking soda/ baking powder with glue and white paint for those white dots.
Thanks for your visit. Check out my video tutorial for more details.
|Home | ^Back To Top | More Fairy House Ideas|
Please LIKE, SHARE and SUBSCRIBE to support my channel.
Share your craft
Do you make your craft? Share it!


