Christmas Santa Hat Fairy House Lamp DIY

Creating a Santa Hat Fairy House Lamp begins with a creative and imaginative heart. This whimsical craft brings the joy of Christmas to life in an easy-to-make home décor.
If you are building a Christmas village, this would be a charming addition that truly invokes sentimental feelings of holiday cheer mixed with fairy tale whimsy.
Let's gather the material. Ehm..not many though. We will re-use some of cardboard which I am sure you already have it at home. And, some hot glue and hot glue gun.
Steps to make Santa hat fairy house

STEP 1:
The first step is crafting windows and a fairy door. Cut cardboard strips about 1 inch/ 2.54 cm width with length enough to make about 3 round windows and 1 door. Remember to take into account the scale of the Santa hat in relation to these elements.
STEP 2:
Next is forming the conical shape of your Santa hat house. This step essentially involves rolling cardboard into a cone, adjusting it to your preferred size and height. If you're using a thin cardboard, consider creating a sturdier double-layered cone. Stable construction here will ensure the house withstands the remaining steps.
Now that you’ve got your conical structure and cut-outs, layout your door and windows on the cone and attach them using hot glue. Make sure the glue is evenly spread and that the edges are secure.
In the next step, let's add a house base. A round piece or irregular of cardboard will suffice, but ensure it has enough room for an LED tea-light candle to fit in the middle. Remember, safety first! LED lights are safe because they don't produce heat, but an actual candle should never be used for this project.
I cut the cardboard base, insert the tealight candle and glue it to the base. Some of you may not like it that way. It's okay! For me, I prefer to glue the tealight candle because it feels complete. Don't worry about the battery. If it runs out, replace the battery. I have a video on how to replace LED tealight candle battery.
After your house is positioned on its base, let's refine the shape and strengthen the connections. Use masking tape to securely bond the house to its base and tape down any protruding edges of the windows or door that may result in a shaky structure.
STEP 3:
Now, cover the whole house with clay paste, joint compound, or wall putty. This will give us smooth texture for painting. Ensure you cover the entire house evenly and don’t forget about the inside edges of the windows and the door.
Once the clay paste is fully dried, it's time to add some artistic touches. Using air dry clay, create a big Poinsettia flower and place it on top of the entrance and also add "dripping snow" on the edges of the roof to give it a wintery feel.
You can use homemade air dry clay or store-bought clay.
STEP 4:
Now comes the fun part, painting! Apply your
choice of acrylic paints to bring your fairy house to life. Traditional
Christmas colors like red for the Santa Hat roof and white for the brim
complete the storybook look but feel free to use your imagination and add your
own personal touches.
STEP 5:
Once the paints are dried, lightly sprinkle baking soda over the wet adhesive to mimic freshly fallen snow. And, that's it! Congratulations! our Santa hat fairy house is done!
Look at your creation! This beautiful fairy house is not just a sparkling piece for your Christmas decorations but also serves as a beacon of creativity and ingenuity in "fairy garden ideas". And, remember, don't feel confined to these steps, one of the best parts of creating crafts is putting your own spin on them.
By the way, Santa hat fairy house lamp project also brings to light the importance of recycling, as we transformed a piece of waste cardboard into a useful and beautiful craft. This project taught us to look at everyday objects with a different perspective, transforming them into unique items.
What better way to celebrate the holiday season than giving discarded cardboard a new lease of life?
Applying creativity in recycling waste into gorgeous home décor is truly inspiring. It opens up a world of possibilities to improve our environment and make our homes more eye-catching and memorable.
I am sure, teachers, students, craft enthusiasts, and even grandparents, would find making the Santa hat fairy house lamp to be a rewarding and enjoyable activity. It's kind of an artful way to connect generations, share stories around the crafting table, and create meaningful holiday mementos.
Indeed, children and adults alike can revel in the joy of the handmade, enriching their imagination, and fostering their creativity. This fairy house lamp is a wonderful example of such a project that all can come together to make.
Whether it's for decorating our home during the holiday season or creating a miniature "Christmas village" or presenting it as a gift to a loved one, this project will surely add a sprinkle of Christmas magic to your home.
Moreover, the lamp isn't just visually appealing, but also
functional. Imagine watching your favorite Christmas movie with this Santa hat fairy house lamp casting a warm and soothing glow around the room. The ambiance
it creates is something truly special and memorable.
Finally, as summary, I think this beautiful fairy house lamp encapsulates all
that is wonderful about crafting - the joy of creating, the satisfaction of
recycling, and the celebration of the holiday spirit. The charm of our Santa
hat fairy house lamp will radiate throughout the house, making this project an
unforgettable feature of anyone's holiday preparations and celebrations.
Oh yah, if you like to watch me making this DIY craft, click on below video.
| Home | Christmas Fairy Houses | ^Top of Page |

Please LIKE, SHARE and SUBSCRIBE to support my channel.

You might like these
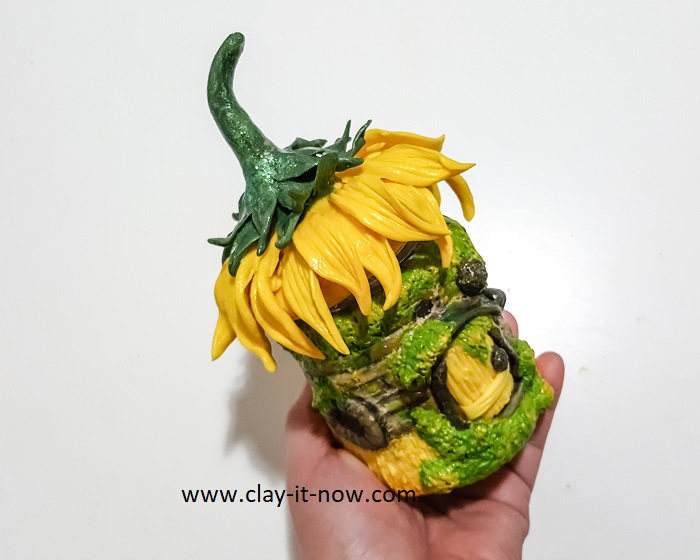
Sunflower Fairy House Jar Idea
Let's make sweet sunflower fairy house jar with air dry homemade clay.
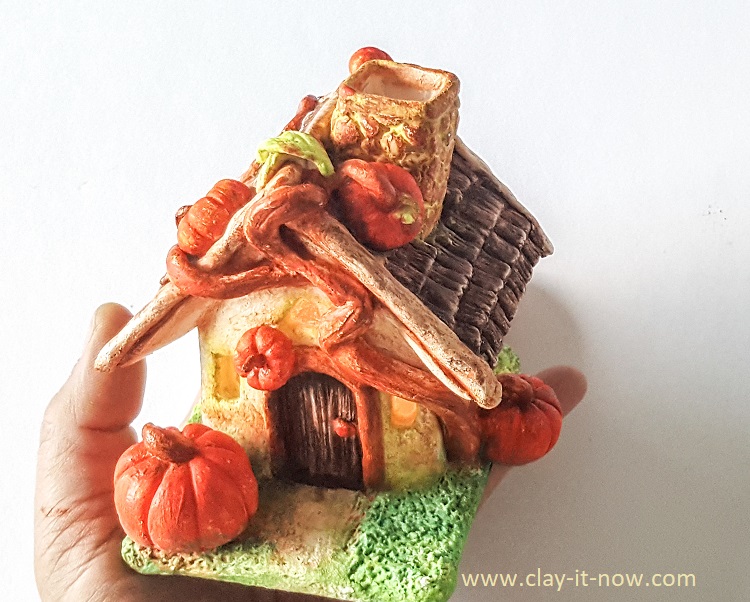
Little Pumpkin Cottage House Tutorial
How to make little pumpkin cottage house with plastic bottle and air dry clay.
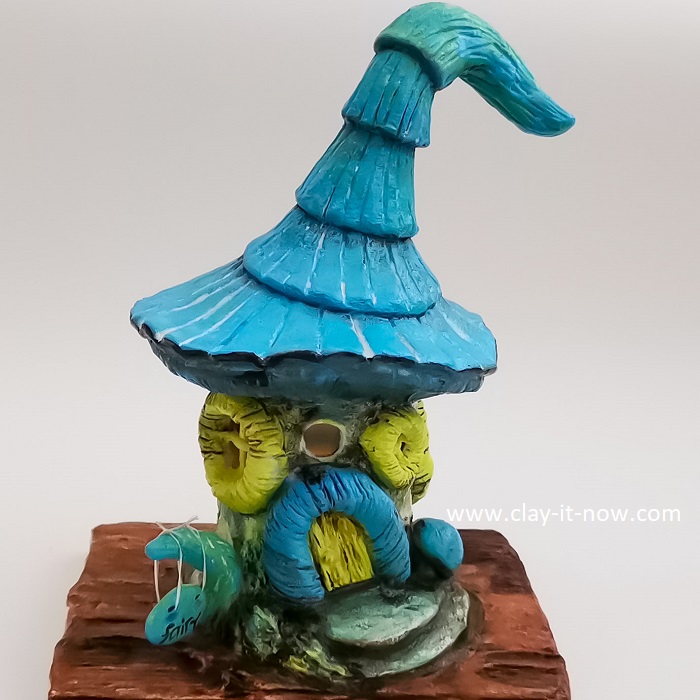
Blue Fairy House, Works with Homemade Clay
This blue fairy house may not have ordinary colour theme for fairy house. What do you think?
Share your craft
Do you make your craft? Share it!