Beautiful Snail Fairy House Lamp DIY Idea & Tutorial
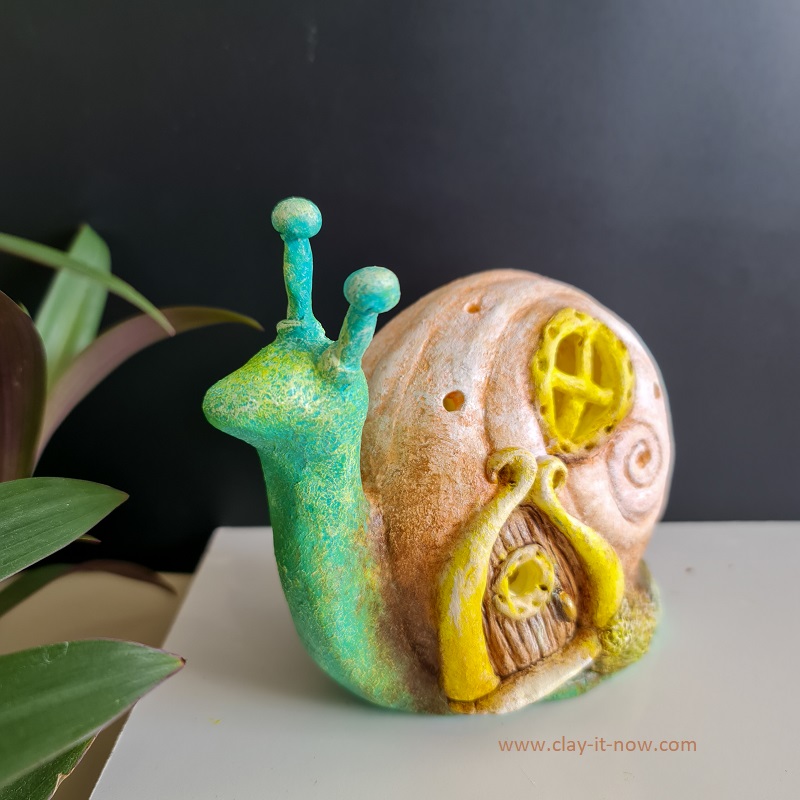
If you have been looking around for snail fairy house with hollow shell where you can insert the lights in it, you'll find the answer here.
Yeah! you don't need to spend lots of money to buy that snail because you can make it with your own hands now.
The best thing is, you have a freedom to choose how you want to design the door, windows and colors of the snail.
Let's have fun!
Steps to make snail fairy house:
Step 1: Make a mold for snail shell with balloon.
Use standard size and shape of balloon that you can find easily at your place. Blow it to about 10cm/ 4inches diameter, and tie. Push the tie to the other end of the balloon and tied it together with rubber band. This way, you will have a kind of donut shape balloon.
Step 2: Make snail head and base.
I use aluminium foil to make the snail head and base because it is easier to shape and sturdy. Alternatively, you can use waste paper. if you use paper, you need masking tapes to keep the shape in place.
Step 3: Insert toothpick for eyes.
Step 4: Attach shell mold/ balloon to the base with double tapes
Make sure you have opening at the base to insert the lights when you finish making the snail fairy house.

Step 5: Wrap the snail shape with air dry clay
In my video, you will see that I wrap the balloon straight away with clay because my clay is soft.
If your modelling air dry clay is hard and difficult to attach it to the balloon, I would suggest that you wrap the balloon with glue and pieces of newspaper (like when you do paper mache). Leave the glue dry and you will have harder surface instead of soft balloon surface.
I use homemade paper clay for this snail fairy house. I use best homemade clay recipe as basic recipe with additional tissue paper.
I've shown you how I have added the tissue paper on to the wet clay when I make bunny egg cup craft video.
Other option for easier paper clay recipe is to use newspaper.
Or, you can use plaster or putty to wrap the snail shell. You can see more info about that at my article about copycat pottery.
Step 6: Add details
This step will determine how your snail fairy house will look at the end. So, think carefully where you want to put the door, windows and its shape.
You can make an outline of the spiraling shape of the snail, add clay to enhance that spiral. And, make some holes for the lights to shine out.
Step 7: Remove the balloon
Remove the balloon only when the clay 100% dry and firm/ hard. Otherwise, you shell may collapse when you remove the balloon.
Step 8: Continue adding detail with clay.
This time you need to finish up the other ide of the snail and cover the hole. It's kind of your opportunity for you to design different style of door if you want so you will have 2 styles of snail house :)
Step 9: Painting
I always excited at this stage. Be careful though. This is the step where you make it or ruin it. LOL
But, don't worry too much. If you make a mistake like making wrong color choice or over painting on certain area, just cover it up with white paints, let it dry and start again :)
I would not put in too much details on painting here. I think it would be clearer if you watch my video to see my color choices.
By the way, I make the snail skin looks like a little bit of flaky by removing some solid color with water and then brush another color on top of it with dry brush technique.
Finally, insert fairy lights and tadaaa......we have magical and beautiful snail fair house at night.

Do you like my idea and tutorial? Yes? would you consider subscribing to my YouTube channel and turn on the notification? This way, you'll be notified when new idea and video uploaded.
Thank you for your support.
| Home | ^Top of Page | More Fairy House DIY Ideas |

Please LIKE, SHARE and SUBSCRIBE to support my channel.

Share your craft
Do you make your craft? Share it!