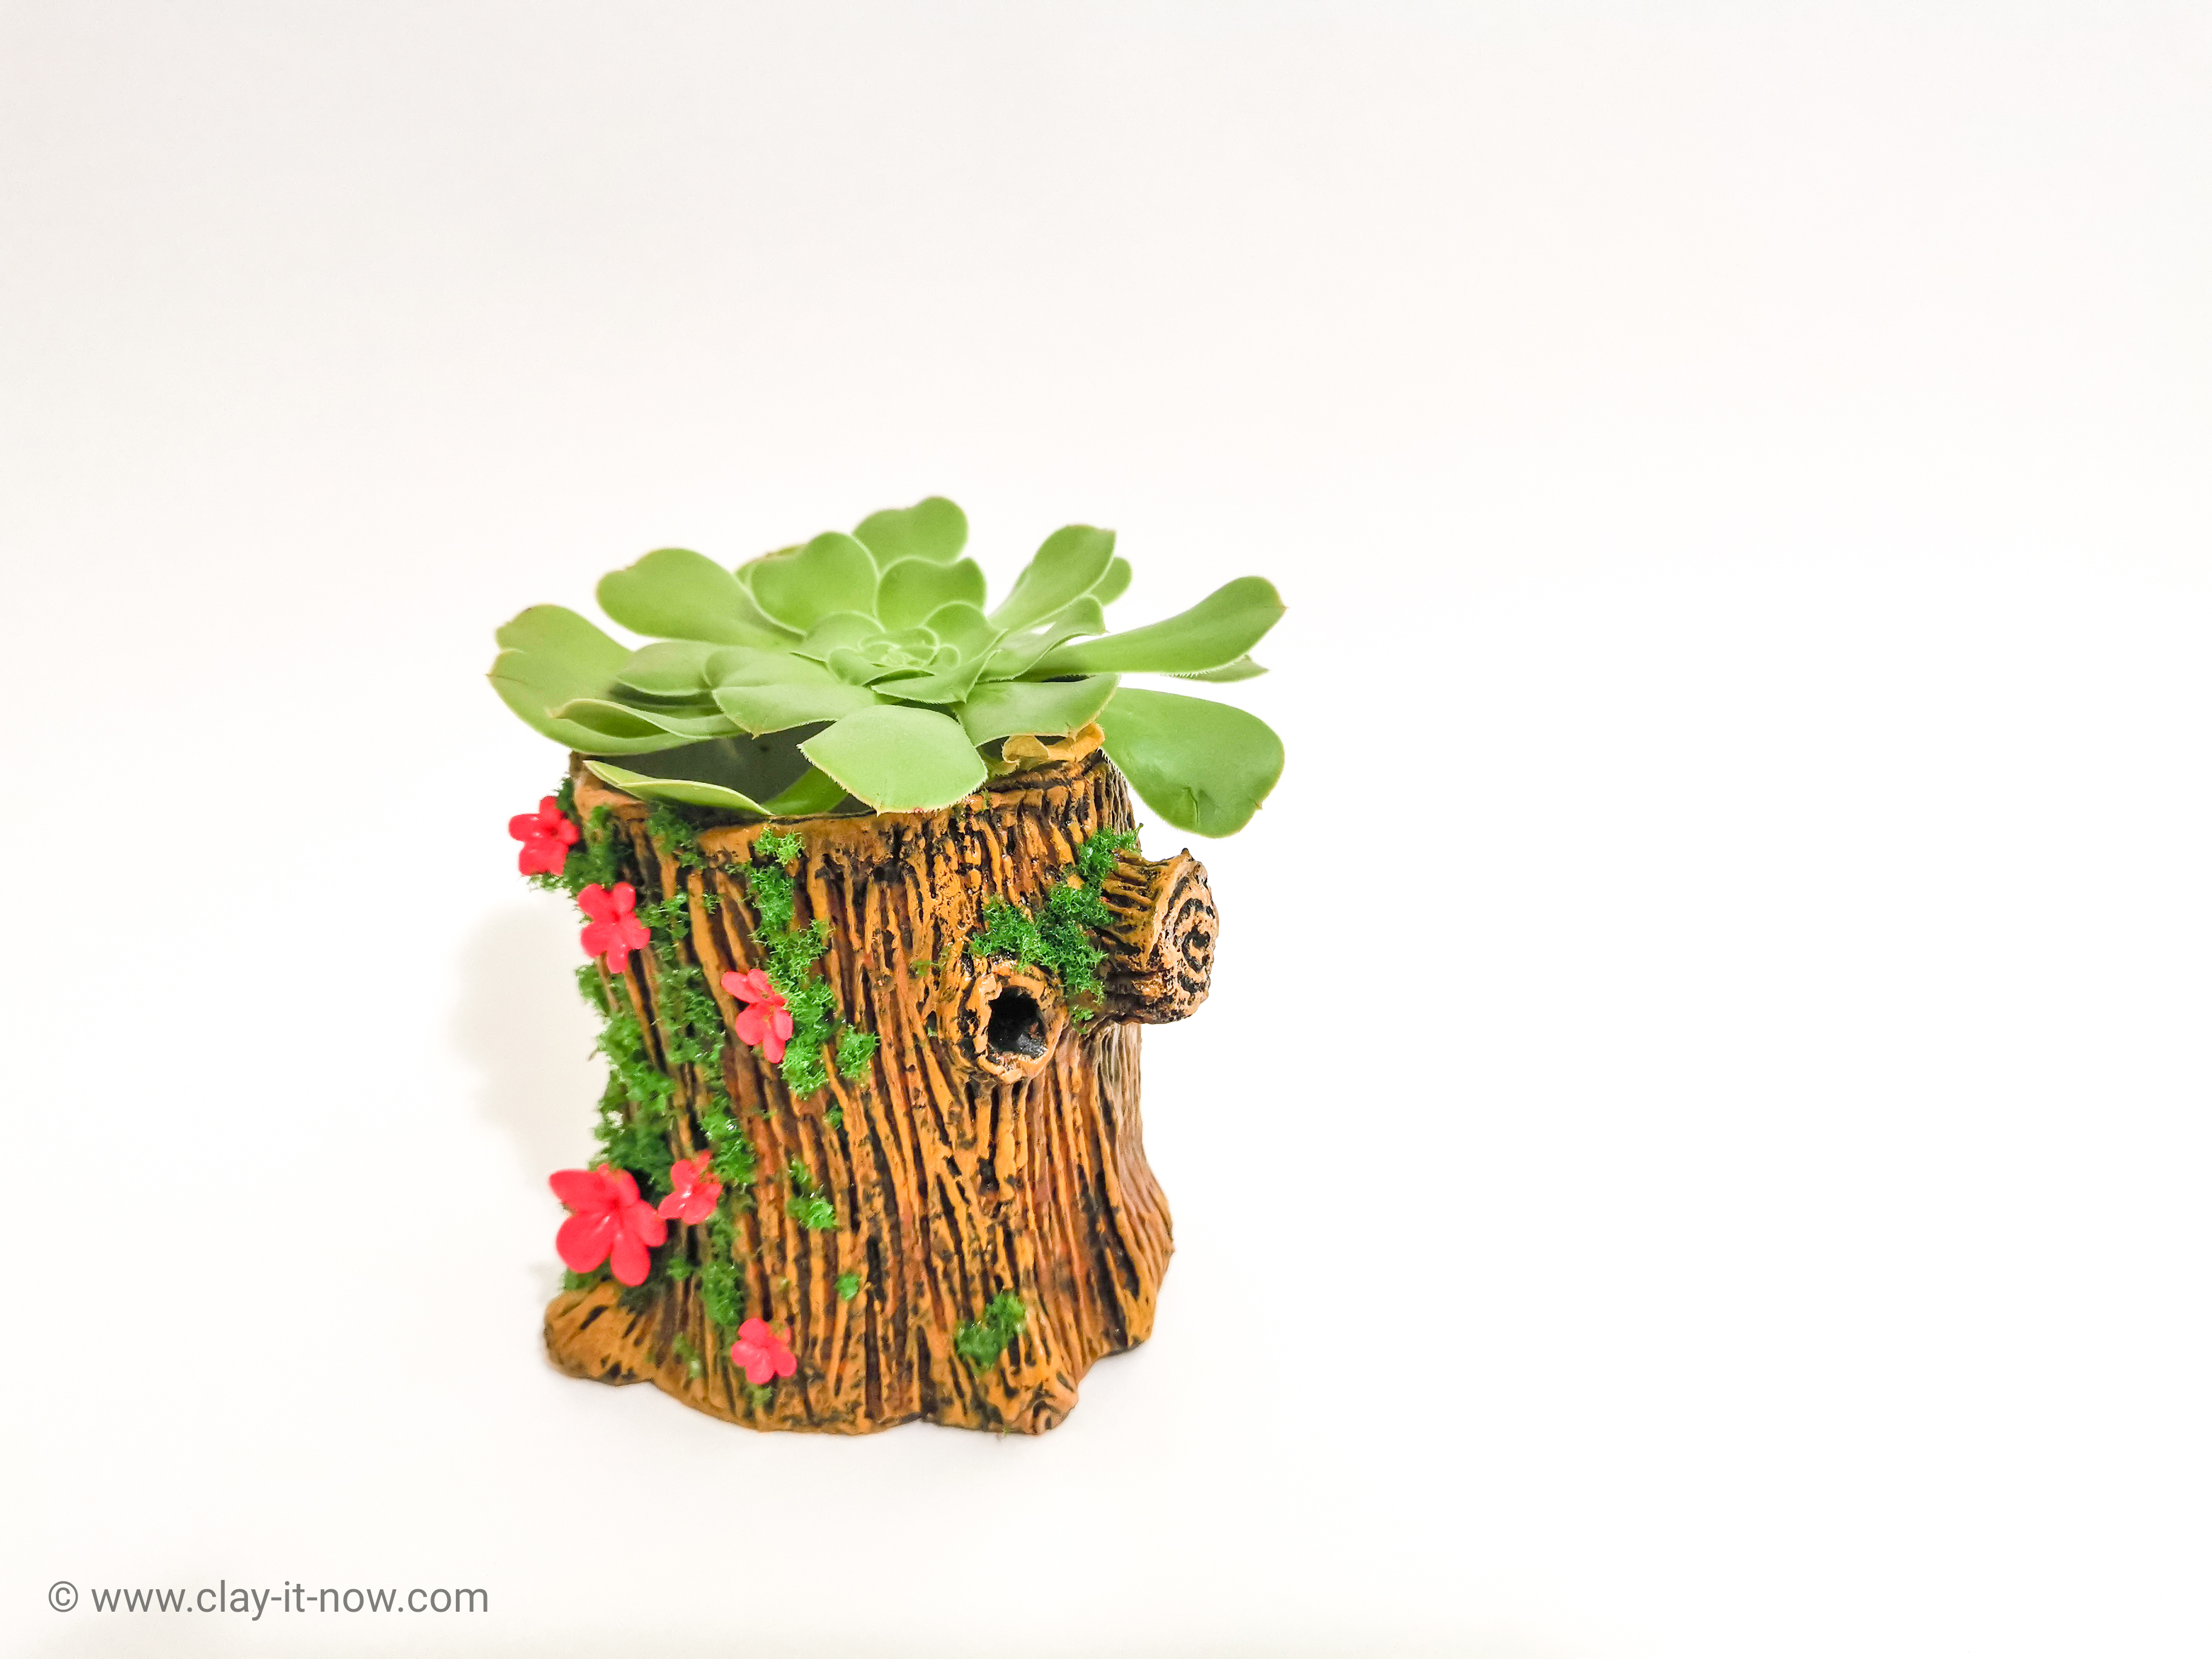
How to make beautiful tree trunk clay for pencil holder or planter?
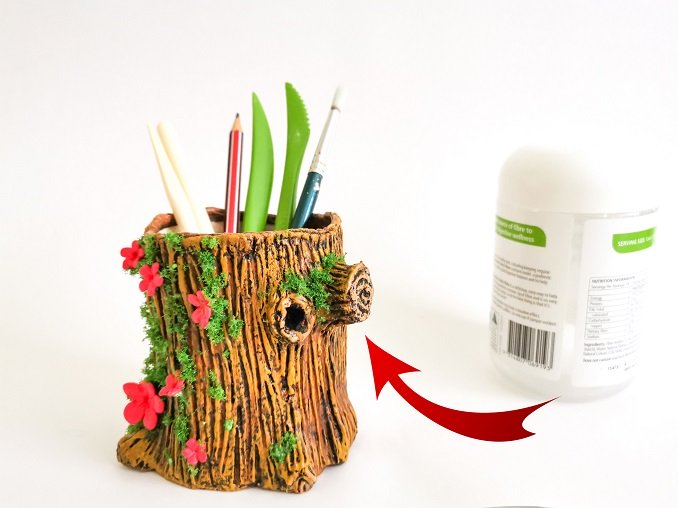
This easy and beautiful tree trunk clay is functional too. Look! we can use it as pencil holder, planter or to store small hobby items. Isn't it cool?
Some of you have told me that you prefer functional crafts rather than a toy or decorative items. Alright!
Ehm...but, I still like making decorative item though but with PLUS. Yes! decorative plus pretty plus easy plus useful :)
This time I am going to re-use my vitamin plastic bottle. I have couple of them by now. We take these supplements everyday since long time ago, not just recently because of current virus pandemic. But, if you don't have this type of plastic bottle, you can use water bottle too.
Let's begin with our craft.
Steps to make tree trunk clay:
First of all, let's prepare our tools and materials:
- Plastic bottle (any type) - I use vitamin bottle.
- Knife, scissor, water, bowl
- Toilet paper
- Craft glue/ school glue
- Aluminium foil
- Hot glue and hot glue gun
- Nail polish remover and cotton pad
- Simple clay tools
- Brushes
- Black Gesso universal primer or black acrylic paint if you don't have it
- Acrylic paints (any brand): burnt sienna and yellow ochre.
- Air dry clay - I use homemade clay to wrap the plastic bottle and to make tree bark texture and store bought crayola soft clay for tiny flowers. You can visit my page about "what clay to buy" to see 3 types of air dry clay available in the market.
- Artificial green moss
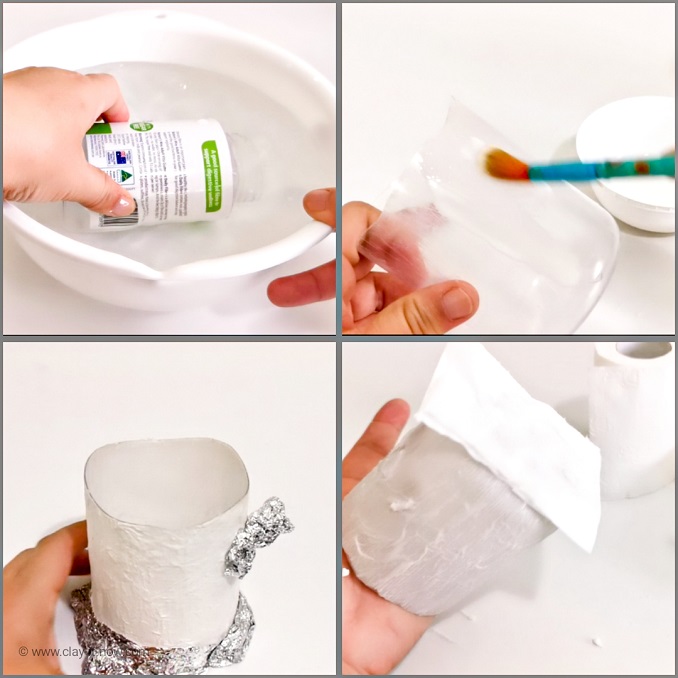
Fist step to make tree trunk clay is to clean up and shaping our plastic bottle. If you use water bottle, you can skip this step. Just cut the label and cut the bottle.
Since I am using vitamin bottle, I have to clean up the label. I soak the bottle in cold water overnight and scrap the label with knife and clean it with nail polish remover and cotton pad.
Once the bottle clean, I cut the bottle with wavy shape instead of straight line so the tree trunk will look softer and more natural.
After that, brush craft glue and cover it with toilet paper. Brush a thin layer of water on top of tissue paper so it will stick to the plastic bottle.
Wait until tissue paper dry. You can use hairdryer to speed up the drying time.
Next, use aluminum foil to shape the cut bottle to look like tree trunk shape.
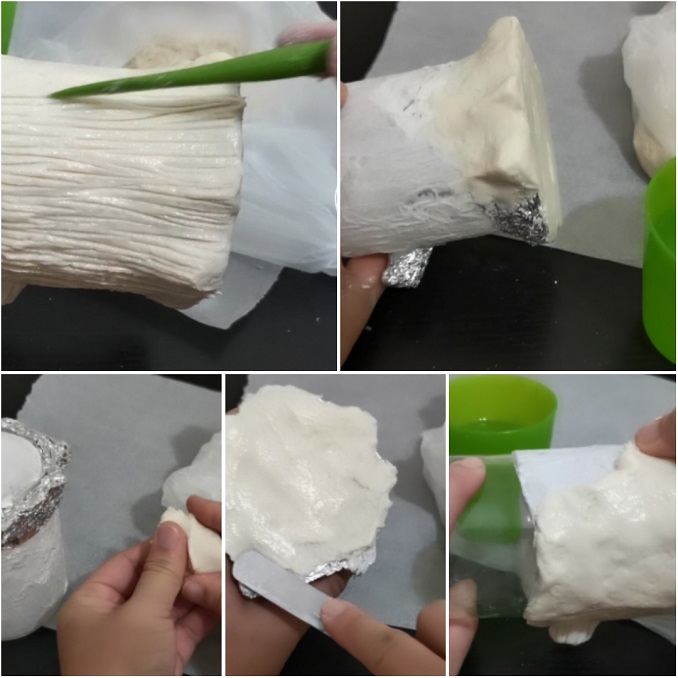
The next step would be wrapping the bottle with clay and adding tree bark texture.
There are few steps to take when wrapping the bottle with clay. You can start with the base of the bottle, then cover all part with aluminium foil and then the rest of the bottle.
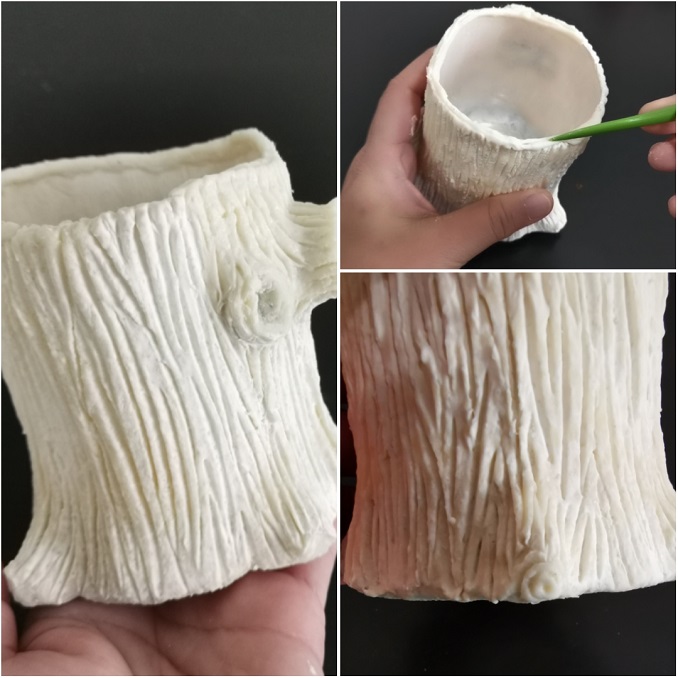
Then, stop here. Wait for the clay to dry.
Tips:
- Brush the clay with thin layer of water to keep the air dry clay moist and flexible.
- Turn the plastic bottle upside down and insert it on glass jar (whatever size suitable with your size of plastic bottle). This make your work easier.
And, the final step of our tree trunk clay project is painting and decorating the trunk with tiny clay flowers to make it pretty :)
That's it. Isn't it easy to make tree trunk clay? What will you do with your craft? I keep this at my patio as succulents planter. Do you know that you can sell this craft too? If you do, all the best!
By the way, if you want to see me making this craft, you can watch my YouTube video tutorial. Please LIKE, SHARE, and SUBSCRIBE to encourage me to make more tutorial. Thank you for your support.
| Home | ^Top | Fairy House Ideas |
Please LIKE, SHARE and SUBSCRIBE to support my channel.
Share your craft
Do you make your craft? Share it!
