5 DIY Homemade Clay Recipes You Can Make at Home: The
Ultimate Guide
These 5 DIY Homemade Clay Recipes are my favorite.
Over the years, I have tested dozens of mixtures to bring you to these 5 favorites clay recipes. I believe that the best art comes from experimentation.
If you’ve ever wondered how to make professional-quality sculptures, home decor, or miniature fairy houses without spending a fortune at the craft store, you are in the right place.
Why make your own clay?
If you don't want to get your hands dirty, buying ready made clay is your best choice.
If you want to make your own clay, let's talk about why DIY is often better:
- cost effective: most of these recipes use pantry staples like flour, salt, and baking soda.
- customizable: we can control the drying time, the strength and the texture.
- eco-friendly: the recipes often incorporate recycled materials like paper pulps from old magazine or newspaper.
5 DIY Homemade Clay Recipes:
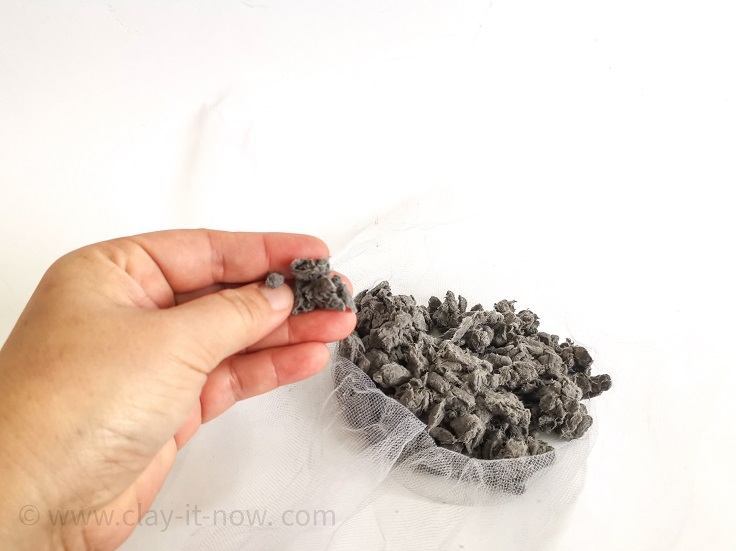
Recipe no.1: Simple Paper Clay (No Glue or Joint Compound).
This is a favorite for those who love organic textures. Unlike traditional papier-mâché, this clay is thick, moldable, and very strong. The beauty of this recipe is that there are no exact measurements—you are the master of the texture!
The 5 simple ingredients:
- Paper pulp (from recycled newspapers)
- Plain flour
- Glutinous rice flour (optional)
- Salt (to prevent mold)
- Water
Step-by-Step Instructions:
STEP 1: Soak shredded newspaper in water until it becomes a soft pulp.
STEP 2: Take 1 part of the wet pulp (squeeze it lightly) and mix it with 1 part plain flour and 1 part glutinous rice flour. Add 1 teaspoon of salt.
STEP 3: Knead the mixture. If it’s too dry, add a splash of water. If it's too soft, add more dry pulp or flour.
Pro-Tip: Using more paper pulp creates a darker, stronger "industrial" clay. More flour creates a whiter, smoother finish perfect for delicate items.
Click on the picture for more details.

Recipe no.2: Plaster-Based Mixtures (Fast Drying).
If you want to speed up your crafting, the plaster-based of 5 DIY Homemade Clay Recipes are your best friend. These can dry in less than 3 hours!
Option A: The No-Glue Formula (Best for Jars)
This is my personal favorite because it does not shrink. If you are wrapping a glass jar or cardboard, this clay won't crack as it dries.
The Recipe: Mix 3 parts Plaster of Paris, 1 part flour, and 2–3 parts water. Add a few drops of baby oil to make it smooth.
Watch my video below for more details.
Option B: The Glue Formula (Flexible)
Adding glue makes the clay behave like cold porcelain. It’s slightly flexible but has more shrinkage.
The Recipe: 3 parts Plaster of Paris, 1 part flour, 1 part glue, 1 part water, and 2 parts baby oil.
I would normally add acrylic color with this mixture to make clay decorations.
Pro-Tip: do not use this clay (with glue) to wrap the jar because when the glue dry, the clay shrink and crack.
You can see how I made purple clay for lovely miniature houses in below video.
Recipe no.3: Baking Soda Clay (No-Cook & No-Glue)
This is an amazing "white" clay that is perfect for holiday ornaments. It is very fine-grained and easy to handle.
The Ingredients:
- 1 part plain flour
- 1 part water
- 1 part baking soda
- 1–2 parts corn flour (cornstarch)
- A handful of shredded toilet paper for added fiber and flexibility.
Method: Combine the dry ingredients first, then slowly incorporate the water and toilet paper until it reaches a dough-like consistency.
Recipe no.4: "Plastdough": The 4-Ingredient Easy Clay.
This recipe is all about durability. It dries to a very hard, stone-like finish.
Why plastdough? I created the name from "plaster of Paris" and "salt dough"
I have 3 version of plastdough.
Version 1 (Heavy Duty): 2 parts Plaster of Paris, 2 parts plain flour, 2 parts salt, and 2 parts water.
Did I test the recipe? Yes! I made 2 gnomes using plastdough version 1 (the video as below).
It took sometimes to dry because of the salt content. So, I put the gnomes close to my stove to let the salt melt and mix well with other ingredients. Without the heat, the salt stays powdery and will make the clay crumbly when it's dry.
Version 2 (Lightweight): 1 part Plaster of Paris, ½ part plain flour, ¼ part salt, and ½ part water.
Checkout my recipe video below.
Version 3 plastdough is the same as recipe 2.
Plastdough version 3 is without salt. Sometimes I add few drops of oil for smoother and more detailed modeling work.
One of craft projects I did using this clay is Mushrooms Tree Stump Fairy House Money Box DIY.
Sometimes I add few spoons of cornflour/ cornstarch to plastdough version 3/ recipe no.2 as you can see at donut fairy house below.
Recipe no.5: The Clayitnow Original Stretchy Recipe
This is the recipe that started it all! It is perfect for professional-looking figurines.
Ingredients:
- 1 cup plain flour (plus an extra 1/3 cup later)
- ½ cup Wood Glue or Elmer's Glue
- 1 tbsp oil (olive or cooking)
- 1 tsp moisturizer/lotion
- 1 tsp vinegar
- ½ cup water
- 1/3 cup cornstarch
Method: Mix the first six ingredients (you can use an electric mixer briefly). Stir in the cornstarch by hand. Finally, add the remaining flour and knead until it is smooth and no longer sticks to your hands. Your hands will tell you when it’s ready!
To me, this recipe is my best homemade clay when I started using it for my crafts more than 5 years ago and still the best until now.
However, since I started using plaster to make homemade clay, my plastdough version 3 which is the same as recipe no.2 becoming my favorite because of the drying speed.
TIPS:
To make your 5 DIY Homemade Clay Recipes successful, you need to know how to maintain your creations.
To me, sealing the clay is very important to keep my craft piece last very..very..long. First step to seal the clay is to paint it with acrylic paints. They seal and make the craft looks gorgeous.
Once the paint is dry, use clear spray sealer or mod-podge to protect the piece.
Conclusion:
With these 5 DIY Homemade Clay Recipes, your creative possibilities are endless. From the fast-drying plaster recipes to the stretchy original formula, you have everything you need to start your next project.
Don't forget to visit the Clayitnow YouTube channel for video tutorials on how we use these clays to build amazing fairy houses and more!
|Home | Christmas Fairy House Ideas |

Please LIKE, SHARE and SUBSCRIBE to support my channel.
Share your craft
Do you make your craft? Share it!